🤖 LLM on a Dime - Exploring large language models without draining your wallet.
LLM on a Dime
Exploring large language models without draining your wallet is easier than ever. Thanks to platforms like Runpod.io, you can spin up powerful LLMs for just a few bucks an hour. Here, we’ll share how to do it so you can dive into cutting-edge AI without breaking the bank. Let’s get started!
Requirements
- Runpod.io account
- Basic LLM & linux knowledge
- 10 bucks (approx 10hrs of usage)
1. Navigate to the Dashboard
-
Upon Signing In
After logging in, you will land on the Runpod dashboard. This is where you can view any existing servers (pods) you have. -
Click on ‘Create Pod’
Look for the button labeled Pods > Deploy. Click on it to begin setting up a new instance.
2. Select GPU / CPU Hardware Type
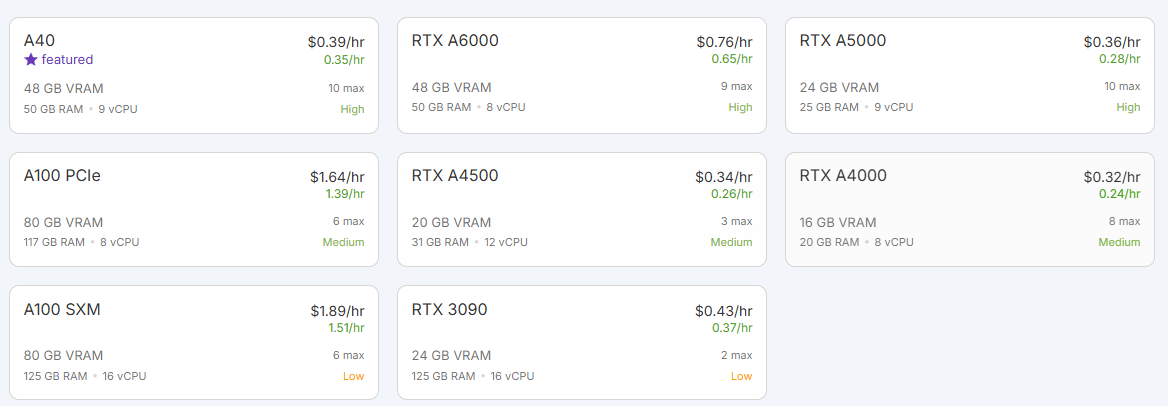
- Choose Instance Type
- Runpod displays different GPU options (e.g., NVIDIA RTX 3090, A10, A100, etc.) with varying prices and performance.
- For this demo I am going to be running DeepSeek-R1 70B parameter model which requires at least 1 NVIDIA A40 (48 GB of VRAM)
- Check Pricing
- Pricing is displayed per hour. Verify the cost fits your budget and that the hardware is suitable for your project.
3. Select Your Use Case / Template
Runpod often provides quick templates for various setups. You have two main approaches:
- Use a Community Template
- Runpod offers community images such as “Stable Diffusion,” “PyTorch,” “TensorFlow,” etc.
- If one meets your needs, select it to simplify your setup.
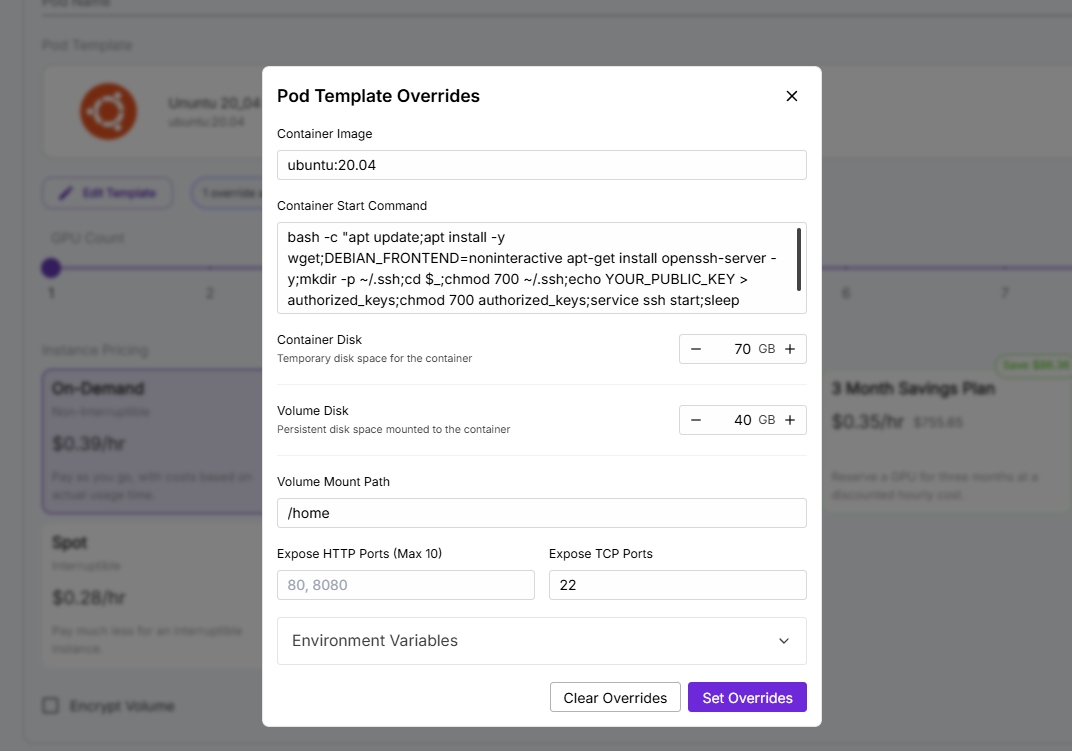
- I’ll be using a simple Ubuntu server Image
- It is important that when running your custom image you make sure to include your public SSH key and increase the container disk size to match the model requirements - In this scenario I’ll need at least 65 Gb on the container disk to run DeepSeek-R1:70B
- Deploy
- Choose the template that best suits your requirements, then click Deploy On-Demand.
- Wait a short time (seconds to minutes) for the pod to start.
4. Connect to Your New Server
Once your pod is running, you can connect in several ways:
Option A: Built-in Runpod Web Shell / Web GUI
- For many templates (e.g., Jupyter Notebook), you’ll see a Connect or Open in Browser button. Click it to open the environment in a new browser tab.
- You can often access a Web Terminal or SSH directly from the Runpod dashboard.
Option B: SSH from Your Local Machine
- Retrieve SSH Info
- In the pod’s details, you’ll see an SSH command, something like:
1
ssh runpod-username@ip-address -p PORT
- In the pod’s details, you’ll see an SSH command, something like:
- Use the Command
- Open a terminal on your local machine, paste the SSH command, and press Enter.
- If you added your SSH key, it will authenticate automatically. Otherwise, you may be prompted for a password. —
5. Install Ollama
- Once connected to the pod, install Ollama
1
curl -fsSL https://ollama.com/install.sh | sh - Install CUDA Drivers https://developer.nvidia.com/cuda-downloads
- Next we are going to use screen to run Ollama server on the background
1
screen -S Ollama - This is going to create a new window where we need to run
ollama serve - Once ollama server is running, we can exit the screen session with
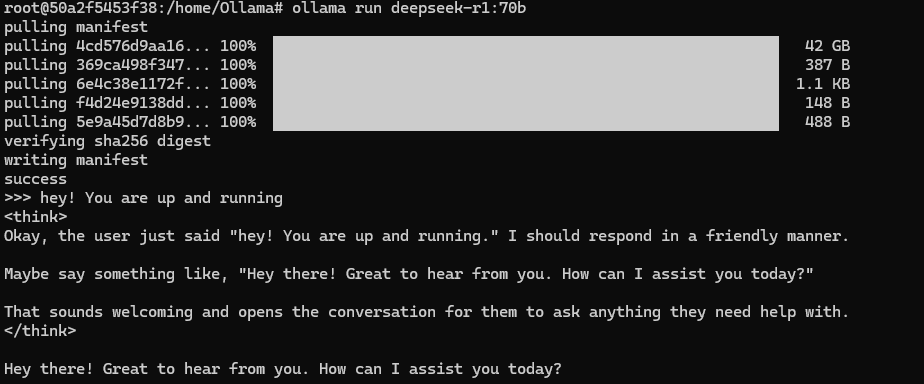
CTRL A + D - Download the desired model e.i DeepSeek-R1:70B - This step should take a couple of minutes.
- Exit Ollama
We now have Ollama and the model installed and we are able to run it from the CLI.
6. Install OpenWeb UI
Time to give your model a sleek web interface with OpenWebUI! Here’s how to set it up.
1
2
3
curl -LsSf https://astral.sh/uv/install.sh | sh
source $HOME/.local/bin/env
DATA_DIR=~/.open-webui uvx --python 3.11 open-webui@latest serve
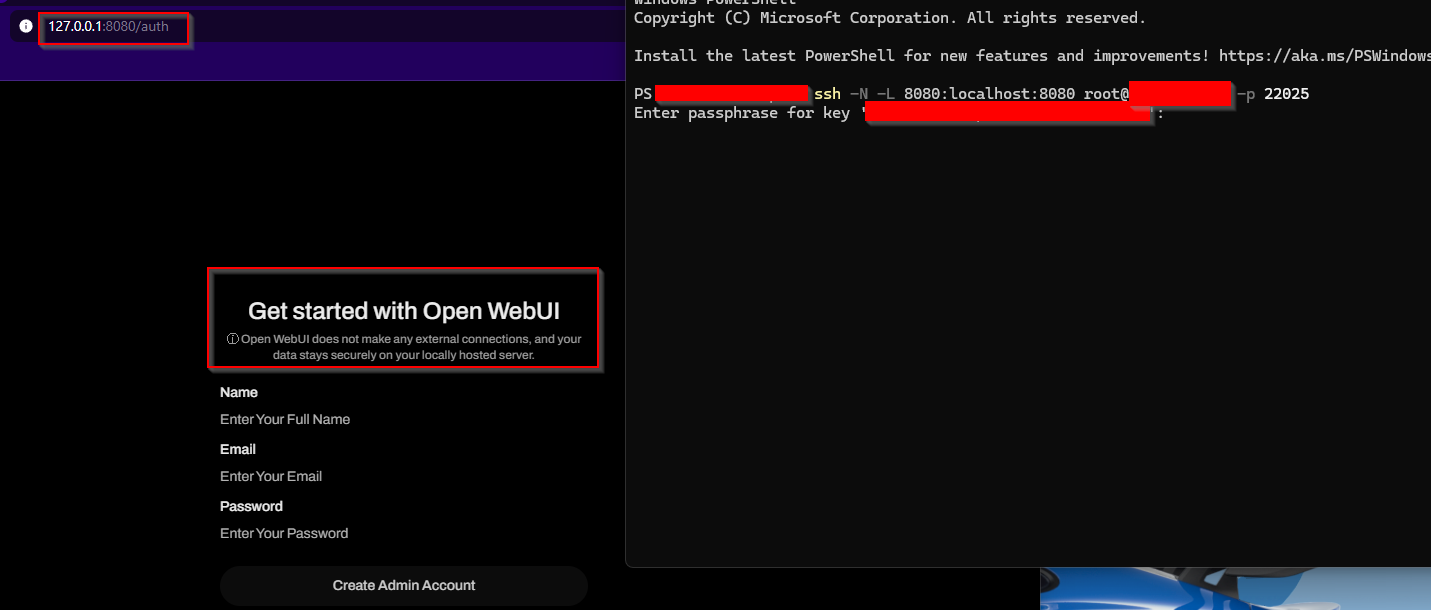
7. Access OpenWebUI in Your Browser
Since everything is running inside a Docker container, directly accessing it via http://
- Establish the Reverse SSH Tunnel
1
   ssh -N -L 8080:localhost:8080 root@your-server-ip -p port
With the reverse SSH tunnel in place, you’re all set to interact with your DeepSeek 70B model through a user-friendly web interface!
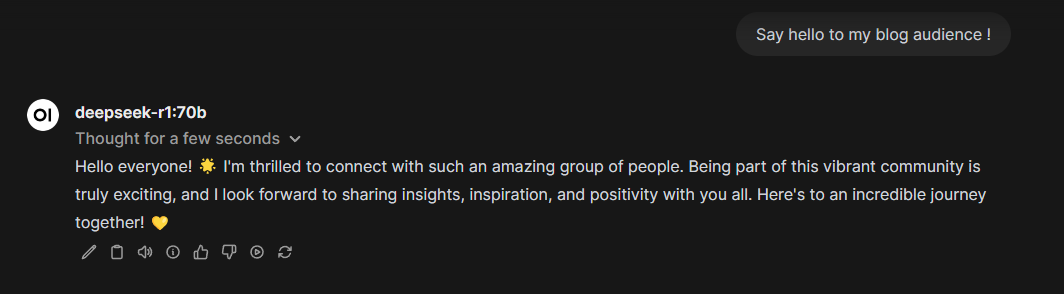
Now, you can run a massive 70B model without the need for an exorbitant upfront investment in hardware, such as a €7,000 graphics card. Instead, leverage cloud platforms like RunPod to access the necessary GPU resources for just a few cents an hour!! Hope you enjoyed it😁